Monday, October 5, 2015

Magento 2 Installation : PHP Extension intl is shown as missing WAMP

When you install Magento 2 using WAMP. Such Extensions missing error shows often.

Don't worry, I also faced same issue and fixed it using Google & Stackoverflow. Here I explain all the fixes step by step. Hope it will help you.

I mentioned below screen as for example of Extension missing error in 'Readiness Check' step of Magento 2 installation.


Before going to perform steps...
Have you enable php_intl extension ? If not then do it first.
 ;extension=php_intl.dll -- remove semicolong form php.ini

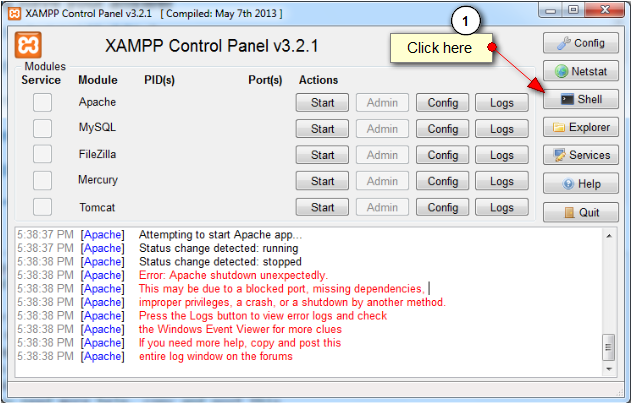
Step 1: First you confirm what is the error actually. So open PHP error log file. refer following screenshot.


PHP log will display the actual warning or error like "
[05-Oct-2015 10:41:17 UTC] PHP Warning:  PHP Startup: Unable to load dynamic library 'E:/wamp/bin/php/php5.5.12/ext/php_intl.dll' - %1 is not a valid Win32 application."

If above warning seems you. Then go to step 2.

Step 2: You have to copy all the files (all files starts with icu*):
icudt.dll
icudt46.dll
icuin.dll
icuin46.dll
icuio.dll
icuio46.dll
icule.dll
icule46.dll
iculx.dll
iculx46.dll
icutest.dll
icutest46.dll
icutu.dll
icutu46.dll
icuuc.dll
icuuc46.dll

From: <wamp_installation_path>/bin/php/php5.4.3/
To: <wamp_installation_path>/bin/apache/apache2.2.22/bin/

Step 3: Restart WAMP and check.

Weldone!!

Source : http://stackoverflow.com/questions/16372888/intl-extension-php-intl-dll-with-wamp


Friday, March 13, 2015

Display new products on the home page Magento

This tutorial will show you how to display new products on the home page in Magento using the Magento block.
  • Open Magento admin panel
  • Go to CMS>Pages>Home page
  • Switch to the content tab
  • Insert the following code:

{{block  type="catalog/product_new" column_count="4"  products_count="12" name="home.catalog.product.new"  alias="product_homepage"  template="catalog/product/new.phtml"}}
 
 
You may clone the new.phtml from
 \app\design\frontend\base\default\template\catalog\product


Thank you.


Thursday, March 12, 2015

How to Set Up Virtual Hosts For Magento at localhost

 Web developer often need to work into vitual host using live domain for  some reason.


Que : If you want to  run the license extensions into localhost, extension will not work.

Solution: Create VirtualHost with same license domain name & perform your work as best.

How you will do it ? follow the following few steps.

Step 1

Go to "C:/Windows/System32/drivers/etc" and open the "hosts" file in Notepad++ or notepad.

File will seem like below.


# Additionally, comments (such as these) may be inserted on individual
# lines or following the machine name denoted by a '#' symbol.
#
# For example:
#
#      102.54.94.97     rhino.acme.com          # source server
#       38.25.63.10     x.acme.com              # x client host

# localhost name resolution is handled within DNS itself.
#    127.0.0.1       localhost
#    ::1  

Add following line at the end file.


127.0.0.1   www.xyz.com   #your site name


Step 2

Open httpd.conf file from "D:\xampp\apache\conf\httpd.conf"
or you can open it directly from XAMPP control panel

Search following line

# Virtual hosts
#Include conf/extra/httpd-vhosts.conf


Remove # (comment ) from #Include conf/extra/httpd-vhosts.conf


Step 3

Go to "C:\xampp\apache\conf\extra\httpd-vhosts.conf"

Add following code at the end of file.


<Directory C:/xampp/htdocs>
Order Deny,Allow  
Allow from all
</Directory>

After the directory code you just added, add following code too:

<VirtualHost *:80>  
DocumentRoot "C:/xampp/htdocs/magento19"
ServerName www.xyz.com
</VirtualHost>


Save all and Restart the Apache.

Step4

Open your browser and enter  "www.xyz.com" into address bar, or whatever your domain name is.


working ? Yes!!!  Enjoy!!!

:( not working ? comment your query here....


Wednesday, March 11, 2015

Add Store View selection to your Module’s Adminhtml

While developing an extension recently I came across the need to add the ability to allow changes on a store view level.

To start off with I wanted to make sure this functioned the same as the built store view selection, to make it easy on the end user (take a look at how store view is handled with CMS Page creation to see what I’m referring to). However, by default Magento keeps its store view information in seperate tables (ie CMS_PAGE_STORE), which wasn’t ideal for this scenerio. The solution I came up with involves using one field ‘store_id’ in your modules table to save the Store ID’s as comma seperated values.

In your module’s adminhtml edit/create form (<Namespace>_<Module>_Block_Adminhtml_<Model>_Edit_Tab_Form)
add the following code in the _prepareForm function where you would like the store selection to show up:

if (!Mage::app()->isSingleStoreMode()) {
    $fieldset->addField('store_id', 'multiselect', array(
        'name' => 'stores[]',
        'label' => Mage::helper('')->__('Store View'),
        'title' => Mage::helper('')->__('Store View'),
        'required' => true,
        'values' => Mage::getSingleton('adminhtml/system_store')
                     ->getStoreValuesForForm(false, true),
    ));
}
else {
    $fieldset->addField('store_id', 'hidden', array(
        'name' => 'stores[]',
        'value' => Mage::app()->getStore(true)->getId()
    ));
}
 
(This adds the store view multiselect to your form if you have multiple stores setup, if not it adds a hidden field with the current stores id taking into consideration the possibility of more stores being added in the future.)

Next in your module’s Controller file (<Namespace>_<Module>_Adminhtml_Controller)
add the following to your saveAction:

if(isset($data['stores'])) {
    if(in_array('0',$data['stores'])){
        $data['store_id'] = '0';
    }
    else{
        $data['store_id'] = implode(",", $data['stores']);
    }
   unset($data['stores']);
}
 
(This sets store_id to 0 if “All Store Views” was selected or sets store_id as comma-seperated values representing the store selection.)
In your modules Grid file (<Namespace>_<Module>_Block_Adminhtml_<Model>_Grid),
add the following:

protected function _prepareCollection(){
    $collection = Mage::getModel('_/')->getCollection();
    foreach($collection as $link){
        if($link->getStoreId() && $link->getStoreId() != 0 ){
            $link->setStoreId(explode(',',$link->getStoreId()));
        }
        else{
            $link->setStoreId(array('0'));
        }
    }
    $this->setCollection($collection);
    return parent::_prepareCollection();
}
 
(This parses the collections store_id’s and resets them as an Array, taking into consideration any that might not be assigned yet or any with a value of 0, which represents ‘All Store Views’)

In the grids prepareColumns function add:

if (!Mage::app()->isSingleStoreMode()) {
    $this->addColumn('store_id', array(
        'header'        => Mage::helper('')->__('Store View'),
        'index'         => 'store_id',
        'type'          => 'store',
        'store_all'     => true,
        'store_view'    => true,
        'sortable'      => true,
        'filter_condition_callback' => array($this,
            '_filterStoreCondition'),
    ));
}
 
(If you have multiple stores setup this will add the “Store View” column with the store selection drop down, if no column is added as its not needed.)
and add the following function:

protected function _filterStoreCondition($collection, $column){
    if (!$value = $column->getFilter()->getValue()) {
        return;
    }
    $this->getCollection()->addStoreFilter($value);
}
 
(This function checks to see if a store filter has been selected and if so calls the function to add the filter to the collection.)
Lastly in your modules Collection file(<Namespace>_<Module>_Model_Mysql4_<Model>_Collection) add this function:

public function addStoreFilter($store, $withAdmin = true){

    if ($store instanceof Mage_Core_Model_Store) {
        $store = array($store->getId());
    }

    if (!is_array($store)) {
        $store = array($store);
    }

    $this->addFilter('store_id', array('in' => $store));

    return $this;
}

Thursday, March 5, 2015

Change Fonts and Reduce File Size for PDF Invoice in Magento

We often meet a situation where we need to print an Order Invoice for a particular customer.

If you ever noticed, the size of a PDF Invoice file is roughly 1.5Mb. It is not a problem if you only need to download a single file.
But in a situation where we need to download 10, 20 or 50 files in one go; the total download size will increase dramatically.
This becomes a headache especially when you need to get these files urgently.

We found a solution to reduce the size of PDF Invoice files. The reason why the PDFs are so large by default is because magento is using the following font

/lib/LinLibertineFont/LinLibertineC_Re-2.8.0.ttf

which is attached to every file. This font file by itself is 1.5MB. We can replace these fonts with Zend_Pdf default fonts. This way we will get smaller file size for our PDFs. In order to do this, just open the file:

app/code/core/Mage/Sales/Model/Order/Pdf/Abstract.php

find lines

$font = Zend_Pdf_Font::fontWithPath(Mage::getBaseDir() . '/lib/LinLibertineFont/LinLibertineC_Re-2.8.0.ttf');

and replace them with

$font = Zend_Pdf_Font::fontWithName(Zend_Pdf_Font::FONT_HELVETICA);

The font of Pdf files will be as readable, though not as beautiful as before. And the size of file will be reduced by minimum 5 times.

If you want to increase the text size on the PDF Invoice for billing and shipping addresses, it can be done by modifying exact same file. Simply change the lines:

protected function _setFontRegular($object, $size = 7)
protected function _setFontBold($object, $size = 7)
protected function _setFontItalic($object, $size = 7)
to
protected function _setFontRegular($object, $size = 9)
protected function _setFontBold($object, $size = 9)
protected function _setFontItalic($object, $size = 9)

accordingly.

As you can see we simply increased the default size value. In order to preserve your modifications from future Magento upgrades you need to copy:

app/code/core/Mage/Sales/Model/Order/Pdf/Abstract.php
into
app/local/code/core/Mage/Sales/Model/Order/Pdf/Abstract.php

and enter your changes there.

Welcome for your queries!!

Tuesday, February 17, 2015

How to show custom collection with layered navigation in Magento ?

Sometime you need to show all special price products collection or any custom product collection of any categories, under selected category (eg. Special) with layered navigation.

copy /app/code/core/Mage/Catalog/Model/Layer.php to /app/code/local/Mage/Catalog/Model/Layer.php

Go to line# 97

Replace following function code

public function getProductCollection()
    {
        if (isset($this->_productCollections[$this->getCurrentCategory()->getId()])) {
            $collection = $this->_productCollections[$this->getCurrentCategory()->getId()];
        } else {
            $collection = $this->getCurrentCategory()->getProductCollection();
            $this->prepareProductCollection($collection);
            $this->_productCollections[$this->getCurrentCategory()->getId()] = $collection;
        }

        return $collection;
    }

with

public function getProductCollection()
    {
        if (isset($this->_productCollections[$this->getCurrentCategory()->getId()]))
        {
            $collection = $this->_productCollections[$this->getCurrentCategory()->getId()];
        }
    else
    {
        //custom code start
        if($this->getCurrentCategory()->getId() == '228')
        {
            $collection = Mage::getResourceModel('catalog/product_collection');
            $todayDate = date('m/d/y');
            $tomorrow = mktime(0, 0, 0, date('m'), date('d'), date('y'));
            $tomorrowDate = date('m/d/y', $tomorrow);

            $collection->addAttributeToFilter('special_from_date', array('date' => true, 'to' => $todayDate))
                ->addAttributeToFilter('special_to_date', array('or'=> array(
                    0 => array('date' => true, 'from' => $tomorrowDate),
                    1 => array('is' => new Zend_Db_Expr('null')))
                ), 'left');

            $this->prepareProductCollection($collection);
            $this->_productCollections[$this->getCurrentCategory()->getId()] = $collection;
        //custom code end
        }

        else
        {

            $collection = $this->getCurrentCategory()->getProductCollection();
            $this->prepareProductCollection($collection);
            $this->_productCollections[$this->getCurrentCategory()->getId()] = $collection;
        }

    }

Enjoy!!!

Re-Index Data With Command Shell

Magento uses a lot of resources to re-index data from the Admin Panel. A good way to re-index data without using the admin panel is to use command shell “ssh”. This also would work if you happen to be locked out of the admin panel.


Here is instruction on how to use default Magento indexer via SSH:

1 – Go to ‘shell’ folder in your Magento installation:

cd shell                                           

2 – Execute reindex using this command:

php -f indexer.php reindexall                      

It is possible to get full list of Magento indexer commands using this command:

php -f indexer.php help                            

To get a list of available indexes, execute this command:
 
php -f indexer.php info                            
 

By default there are 8 indexes in Magento:

catalog_product_attribute     Product Attributes   
catalog_product_price         Product Prices       
catalog_url                   Catalog Url Rewrites 
catalog_product_flat          Product Flat Data    
catalog_category_flat         Category Flat Data   
catalog_category_product      Category Products    
catalogsearch_fulltext        Catalog Search Index 
cataloginventory_stock        Stock status         

Individual commands for re-indexing:

php indexer.php --reindex catalog_product_attribute
php indexer.php --reindex catalog_product_price    
php indexer.php --reindex catalog_url              
php indexer.php --reindex catalog_product_flat     
php indexer.php --reindex catalog_category_flat    
php indexer.php --reindex catalog_category_product 
php indexer.php --reindex catalogsearch_fulltext   
php indexer.php --reindex cataloginventory_stock   
php indexer.php --reindex tag_summary              
 

Usefull SSH commands for magento developer.

Create zip file of folder via SSH.
    tar czvf <filename.tar.gz> <DIRECTORY or DIRECTORY PATH>

Extract zip file to particular destination folder.
    unzip file.zip -d destination_folder   

Change file permission
  chmod -r 777 filename

Friday, February 6, 2015

How to import sql file into using shell in windows xampp ?


Method 1

Open shell from xampp control panel.


Type  
cd mysql/bin

Press enter & type
mysql -u root -p db_name

It will ask for password so type your password. if it is critical to type then please use copy paste tool.


Type  
source filepath/filename.sql


eg. source c:\db_filename.sql


Any query welcome!!

Tuesday, February 3, 2015

Scope of Information Technology in coming future

We all know that the world had become impossible to move without Information Technology. The technologies are developing day by day. The fast growth in technological field had made the world a better and fast moving place. The growth is due to the increase in applications of computers in almost every field. Today in this article I am going to express ideas about Information Technology in front of you.

Introduction

The term Information Technology refers to the application of technology by considering an information. The storing, manipulation and management of data using computer can also be defined as an Information Technology. The IT sector has grown much faster globally. Today even India is standing as a developing country due to this vast growth in IT sector. The vacancies in IT professions are also increasing due to the variety of performance of IT professionals in every fields. The above mentioned reason also force IT industries to provide employments upon a large scale. The different small branches of IT such as Database Management, Networking, Information, Security, Cloud Computing, Business Intelligence etc are also increasing day by day.

Advantage in IT

IT sector can be said as a pot of chances that give one many opportunities to reach top in his/her life. The main specialty of this field is that one can reach his success by just having some qualities like creativity, willpower to learn new things, ability to withstand any situations and confidence.

Everyone use to dream a house in his 35th age, a car in 40 and an excellent retirement amount of 10-15 lakhs in his/her account. But a talented IT professional can acquire those dreams within his 30's. Even a government employer may take years of experience to get increment in his/her salary and post, but here in IT sector it just take some months to get it.

IT also help a professional to get fixed his meetings abroad, this help him to get job opportunities in many foreign companies and it will definitely make his world immense. IT also helps in increasing one`s talent and personality.

Career in Information Technology

IT students have a lot of scope for their future. Since the technologies and IT sectors are increasing day by day, the need of employers are also increasing. But just reaching IT field for the sake of a degree and a job wont give success. Because in coming future the IT industries do not adopt employers having degrees for a short term course, they need really talented and well experienced employers to do their job.

Job security in IT

At one side there are huge chances but one of the main drawback of this field is that it does not provide any job security. We cannot predict whether our job or even company will be there tomorrow. Even though the IT job don`t last longer, there is a hope for getting another job in the same field. There will be no problem for those who are having experience certificate, in case of job loss.

Conclusion

No doubt that IT fields are in its developing path. There will never be any degrading in its opportunities. IT may be the best field for those searching for self employments. If you are able to get success in your IT courses, then I can guarantee that your dreams will never die. The scope of IT field will continue increasing even on next decades.

This article found me on GOOGLE.  I thought to share all of you.

Friday, January 30, 2015

How to install Jmeter in easy steps


Following link will be very useful to install jmeter into your localhost.

http://www.guru99.com/guide-to-install-jmeter.html

Script to clean up the images tables in a Magento installation. Removes references to non-existing images, removes duplicate images, sets correct default image and deletes orphaned images from the filesystem.

I would like to go through following link.

It's very simple & easy. You can save the huge amount of web space of your website.

https://gist.github.com/peterjaap/5547654

Change Magento session timeout

Change Magento session timeout

Magento sets the admin session by default to expire after 3600 seconds (1 hour).
This is how to change the session timeout

System  >> Configuration >> Admin >> Security

Set your desired session timeout
magento-admin-session-lifetime


Next we have to make sure the session cookie doesn’t expire.

System >> Configuration >> Web >> Session Cookie Management

Set the Cookie Lifetime to a larger number.

Thank you.

Thursday, January 29, 2015

#1045 - access denied for user 'root'@'localhost' (using password no) xampp

I had this problem after changing the password for the root user in phpMyAdmin. I know nothing about programming but I solved it by doing the following:
  1. Go to file C:\xampp\phpMyAdmin\config.inc.php
    (I guess you would replace "wamp" with the name of your server if you're not using Wamp Server)
  2. Find the line $cfg['Servers'][$i]['password']='' and change this to
    $cfg['Servers'][$i]['password']='NO'
  3. Try opening phpMyAdmin again, and hopefully the message will now read "Access denied for user 'root'@'localhost' (using password: YES)
  4. Now change the password in the above line to 'yourpassword' (whatever you had set it to before)
Hope this helps somebody.


For screen shot &  command prompt you can visit following link.

https://www.ostraining.com/blog/coding/error-1045-phpmyadmin/